


October 2023
 Loading...
If we want to invest in NFTs, the first thing we must define is the wallet where we will store them. A wallet is an application that works as a cryptocurrency wallet and in most cases, currently, as a NFT wallet.
It is essential to have this application to buy, save and sell our NFTs. In this article we will focus on the Metamask wallet, the most complete wallet par excellence because of its ability to connect to practically all existing blockchain protocols, especially DeFi protocols or also called decentralized finance protocols, therefore your initials.
Metamask is a self-custodial and online wallet, so we will always have full control over our funds and NFTs, unlike having the funds in an Exchange (online cryptocurrency exchange house, such as Binance or Coinbase) where are stored centrally. Being self-custodial, the application will provide us with private keys and a seed phrase that we will need to have written down in a safe place and will be useful in the event that we need to reinstall the computer or use the wallet on another computer or mobile. It is recommended that you write this information down on paper and keep it in a safe place. Also make a copy and save it in a backup place since it is the only way to recover our wallet in case of destruction / loss / moving of the device and regain control of our funds and NFTs.
Metamask has two versions, a version for mobile devices and a version for the computer. If you have a personal computer where only you or the most trusted people have access, we recommend working with the computer version for its ease and convenience to operate. Although you can also choose the mobile version if you feel more secure storing your cryptocurrencies and NFTs there. Even the mobile can be stored even in a safe. For these practices there are also cold wallets, special hardware similar to a USB, but here we refer to the use of the Metamask application. Keep in mind that anyone who has access to your computer or mobile phone could transfer those cryptocurrencies and/or NFTs, although Metamask has a basic level of security that requires a password to operate.
In case of choosing the version for the computer, you will have to be careful not to install programs of unknown origin and/or perform any type of practice that is likely to facilitate its hacking, remember that you will manage your funds and NFTs from the wallet that you will install.
If you start using Metamask on the desktop version and for some reason decide to switch to the mobile version, you can do so by installing the app on your mobile and using the seed phrase provided in the desktop version. Once you see the funds and NFTs on the new device, you can permanently uninstall the wallet from the computer.
To buy an NFT you need to have a cryptocurrency balance in your wallet. Although NFTs can be created and traded on various blockchains, in this article we will refer to Ethereum and Polygon, the latter being a lightweight blockchain that works with the Ethereum network. Therefore you will need to have an available balance in Ethereum to be able to buy NFTs. In general, this balance must be transferred from an Exchange, although it can also be transferred from another Metamask wallet or any market wallet that supports the Ethereum network for the aforementioned case.
The Metamask desktop version needs to be installed as a web browser extension. There are extensions for Chrome, Mozilla Firefox and Brave. In this example we show how to install the extension for Chrome, but in the extensions for Mozilla Firefox and Brave it is operated in the same way..
First you must open the official Metamask site, you have to be very careful because there are many scams and imitations that emulate this wallet and whose purpose is to appropriate the funds. Here we provide the link:
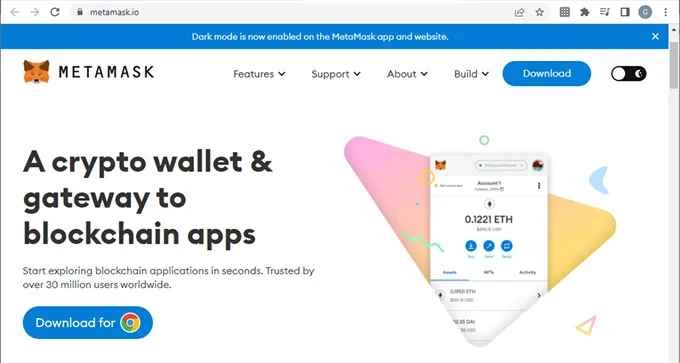
1. Open the Metamask site with the provided link
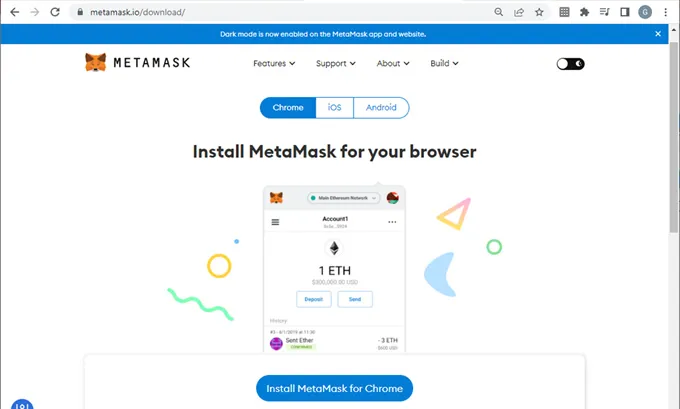
2. Once the site is opened on the browser, for this example Chrome, look for the “Download” button located at the top right as shown in the image. It will load the following page:
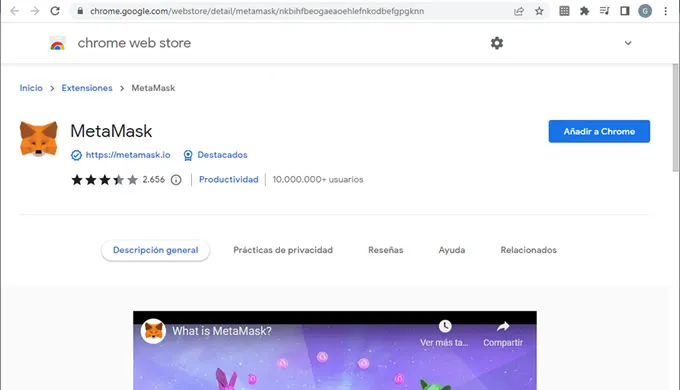
3. Here clicking on the “Install Metamask for Chrome” button will open the configuration of the Chrome browser extensions:
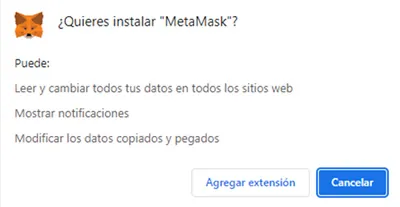
4. Press the button on the top right "Add to Chrome" and the following alert will be displayed:
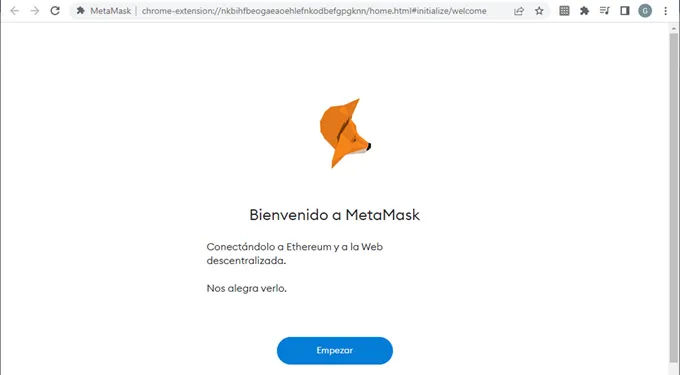
5. Press “Add Extension”. Wait a few moments, Chrome will do a series of checks and finally the welcome message will be displayed
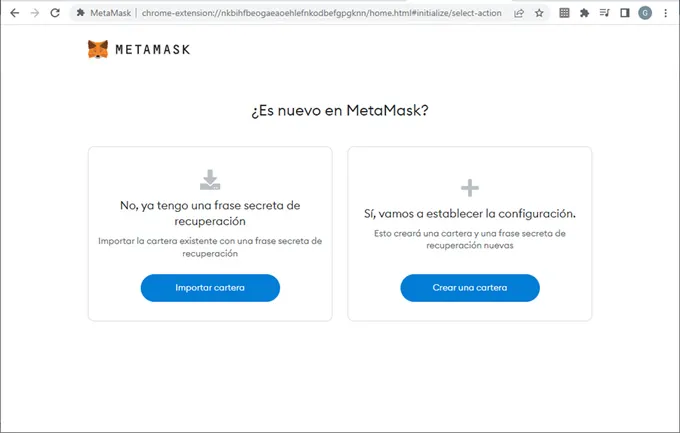
6. Press “Start” and the following screen will be displayed:
7. Press the button on the right "Create a wallet"
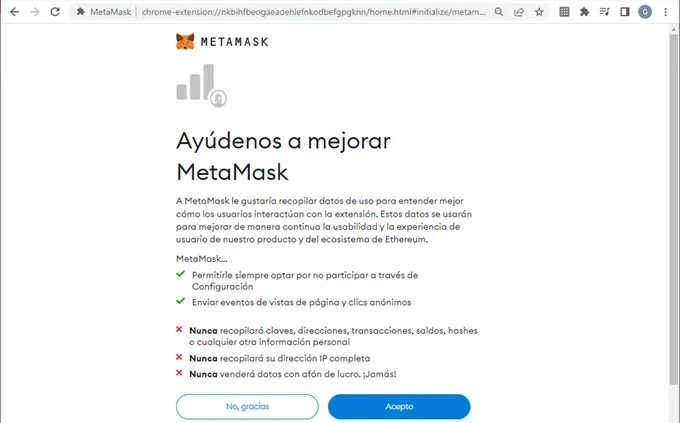
8. That asks if they can collect some information that obviously doesn't compromise the security of your funds and NFTs, but will be used by the creators of the app to improve the product. Here you will take the decision with which you feel most comfortable. "No, Thanks" and "I accept", both are valid to choose.
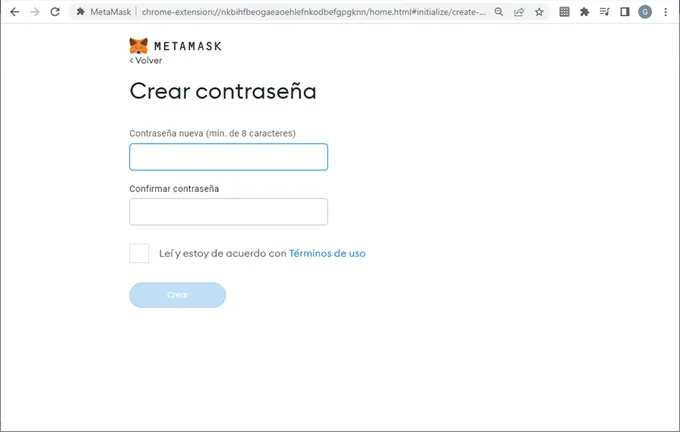
9. You need to enter a password to be able to access the wallet and/or confirm your operations, it depends on the security preferences you choose later. You must agree to the terms of use in order to create the wallet on your computer. Press the “Create” button, then the following recommendations and FAQs will be displayed:
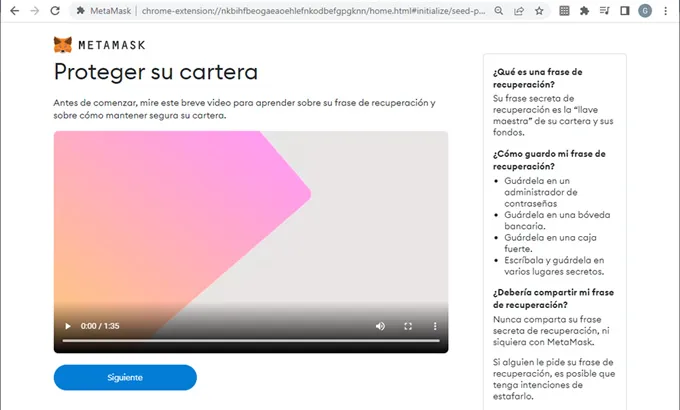
Now that invites us to learn about our device destruction/lost/moving recovery phrase and how to keep your wallet safe.
We transcribe the frequently asked questions that Metamask invites you to read once the wallet has been created on our computer
What is a recovery phrase?
Your secret recovery phrase is the “master key” to your portfolio and funds.
How do I save my recovery phrase?
Should I share my recovery phrase?
Never share your recovery secret phrase, even with MetaMask. If someone asks for your recovery phrase, they may be trying to scam you.
Pressing “Next” informs the seed phrase that we mentioned in the introduction:
10. Click on the indicated place to reveal the secret phrase. It is a concatenation of words that have no relation to each other
WARNING: Do not reveal your backup phrase. Anyone who knows this phrase could appropriate your funds
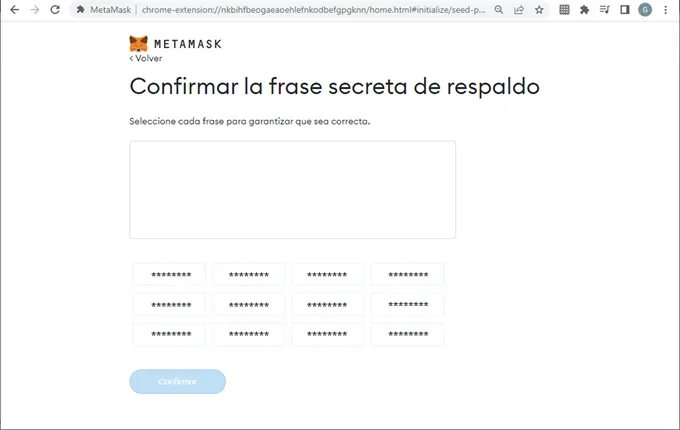
Pressing “Next” and continuing, the following screen will be displayed:
11. A right practice is to take the paper where you have written down the seed phrase and press click on each word of the rectangles that are shown at the bottom of the page in the corresponding order that you have written down, then on the upper box the phrase will be built as you click on each word. In this way you will ensure that you have correctly written down each word, guaranteeing to recover your funds and/or NFTs in case of destruction/loss/movement of the device. Once you have selected the words in the corresponding order, press "Confirm"
12. Installation finished! Press “All Ready” to start using your Metamask wallet from the computer.
Once installed, the metamask wallet is used as a browser plugin, in this case Chrome. That is, to open it before we need to open Chrome.
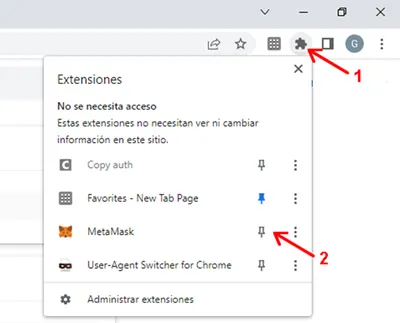
1. If you are looking to use the wallet more easily, we recommend going to the Chrome extensions icon (1) and attaching Metamask with the clip that appears on the right (2), as shown in the image
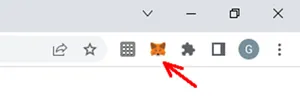
2. By pressing on the anchor clip the browser will integrate Metamask to the right of the address bar with the application icon
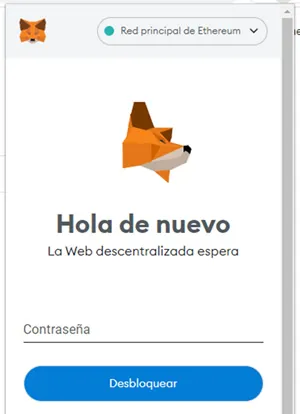
3. Click on the Chrome Metamask icon. A password is requested. The password you entered at the beginning must be typed to unlock the wallet
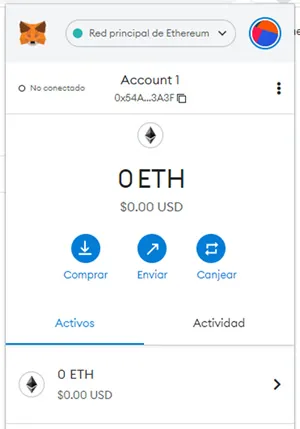
4. The wallet to store cryptocurrencies and NFTs is now ready to use. The password will be requested periodically for security
NOTE: The password is used to unlock the wallet and protects you from a third party using the computer, as long as that person does not know the password. But that doesn't relate to the seed phrase whose use is different and was explained earlier.
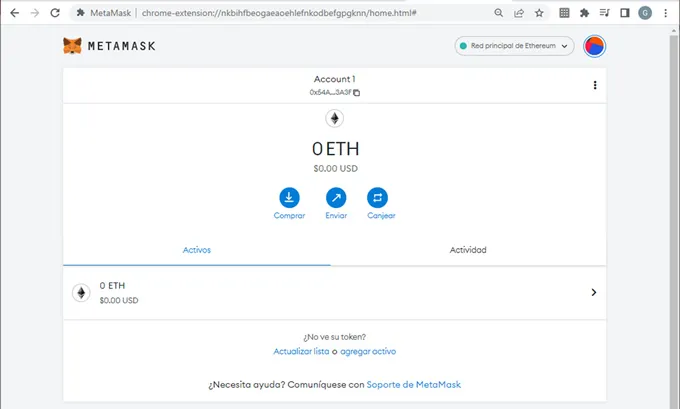
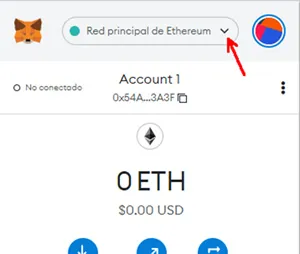
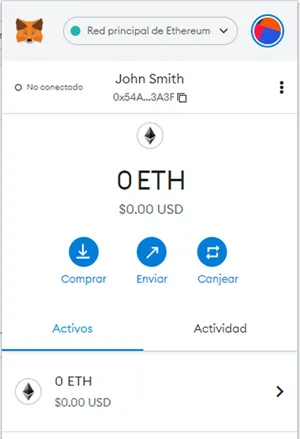
This point is very important. A feature that makes Metamask stand out from other wallets to contain our cryptocurrencies and NFTs is that it works with almost all the protocols and networks of the blockchain. When installing Metamask by default it starts on the Ethereum network and lists the ETH cryptocurrency at zero value, obviously because we have no funds.
There is the possibility to configure other networks in the wallet and/or to list more cryptocurrencies for the selected network. This article will focus on buying NFTs within the Ethereum and Polygon networks, so it only takes one more step to get the wallet ready.
It is not necessary to configure the Ethereum network because it is installed by default, but the Polygon network must be configured manually within the wallet.
The installation of this wallet automatically configures the Ethereum network by default. In order for the NFTs buying experience to be complete, it is necessary to configure an additional network to the one selected by default in Metamask, in this case you need to configure the Polygon network.
1. Select the combo where it says “Ethereum Main Network”
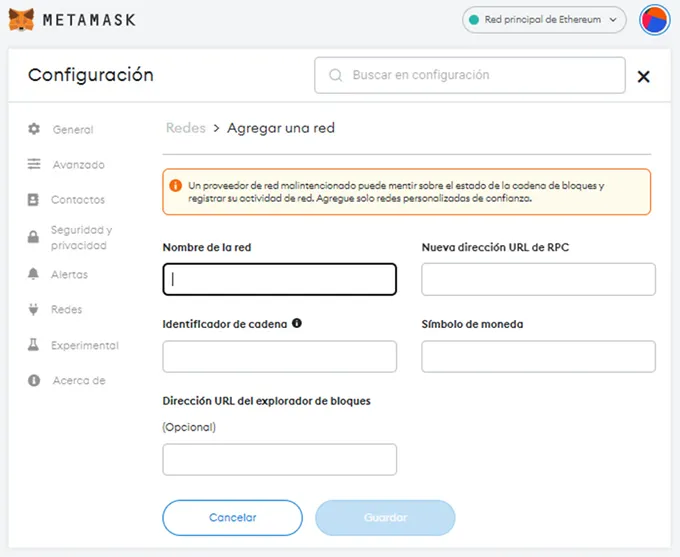
2. Select "Add network" and it shows us the following:
3. You need to enter the following information to configure the Polygon network in the wallet:
| Network name: | Polygon Mainnet |
| New RPC URL: | https://rpc-mainnet.maticvigil.com |
| String Identifier: | 137 |
| Currency symbol: | MATIC |
| Block explorer URL | https://explorer.matic.network |
Press the "Save" button and it will show us the following:
4. The Polygon network with its default cryptocurrency called MATIC is selected
Once this is done, it is possible to change the view of the wallet to the network of your choice by selecting the combo above that will allow us to choose between “Ethereum Mainnet” and “Polygon Mainnet”. When changing the view, the funds available in the wallet for each cryptocurrency of the chosen network will appear, in this case ETH for the Ethereum network and MATIC for the Polygon network.
The funds can be received from an exchange or from another wallet. The most common is to send funds from your account in an exchange to your Metamask wallet. We remind you that an exchange is like a FIAT money exchange house for cryptocurrencies and vice versa and unlike wallets like Metamask that allow self-control of your funds, exchanges centrally guard your funds. The objective of this operation is to provide you wallet with enough ETH and/or MATIC to subsequently make purchases of the NFTs of our preference according to the approach of this tutorial.
The first thing you need to know is your Metamask wallet address, then you need to enter this address on the exchange or another wallet to transfer the funds to your Metamask wallet. One way to do it is as follows:
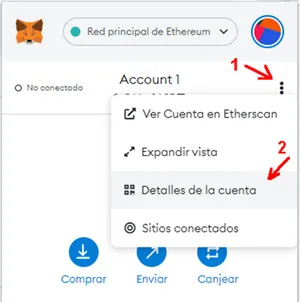
1. Select the 3 dots on the top right (1) and then account details from the dropdown menu (2) . It will show the following:
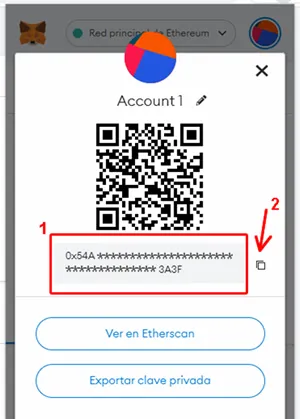
2. A QR code is displayed that identifies your wallet and whose usefulness is to be able to scan it from another wallet in order to speed up the transfer of funds. Then the address that identifies your wallet (1) is displayed and that you will need to enter manually in the exchange or in another wallet, then you will be indicating that you need to transfer the funds to your Metamask wallet. Reading the QR code is an alternative when you do not have a mobile device to transfer the funds. Finally, the copy symbol (2) is displayed, pressing it will copy the address of your wallet to the buffer of your computer, which will make it possible to paste it in your exchange or in another wallet in case you operate on the same computer, or, Paste it in an e-mail or messaging program, for example, to request the transfer of funds to your Metamask wallet.
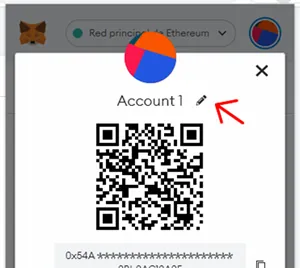
Metamask can manage more than one account in the same wallet, that is the equivalent of having several wallets with different addresses within the same application and therefore different fund balances and NFT holdings. In this article we will not delve into this possibility since it is used by advanced users. We will simply mention how you can enter a custom name for the default account of your wallet:
1. Click on the editing pencil
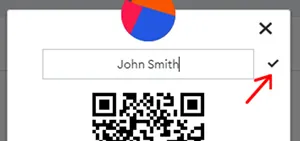
2. Enter your name, nickname or preference tag. This data is internal to yourself, so you can enter whatever you want or keep it as it is. Confirm on the accept tick
3. Your account has been personalized
The idea is to determine which NFTs you will buy, within which network they are (Ethereum or Polygon) and the approximate value in ETH that you will need to know to fund your wallet.
Very important to know:
The advantage of buying NFTs created under the Polygon network is that the gas fee is not paid for the purchase operation, and if it is paid, it is usually the equivalent of a few dollars or cents. But we delve into this in the article that we mention below.
We invite you to read our article "Step by step how to buy an NFT to invest" where we use the Opensea marketplace since it is one of the marketplaces with the highest number of monthly visits, more than 60 million monthly visits from people who come to buy or sell your NFTs within this marketplace, pioneer and market leader.
Once you have ETH and/or MATIC funds in your wallet, you are ready to buy the NFTs. Surely you will first need to know which NFTs you are interested in to determine a budget and then provide your wallet with the necessary funds as mentioned above.
We invite you to read our article "How to transfer funds from Binance to our Metamask wallet" where we use the Binance exchange as an example, but the tutorial can also be applied to any other exchange since the concepts and procedures are the same, what changes are the views.
Always when restarting the computer or when closing the web browser and reopening it, Metamask will request the password that it has requested at the time of installation. As a good practice, although it is optional, it is also possible to configure the frequency with which Metamask will request a password to be able to operate even without having closed the browser. It depends on how you feel more comfortable and safe, we indicate how to do it:
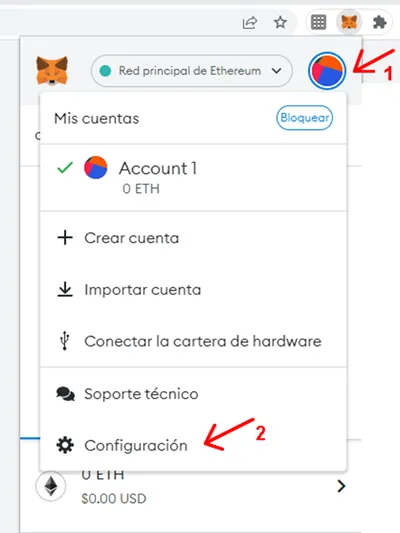
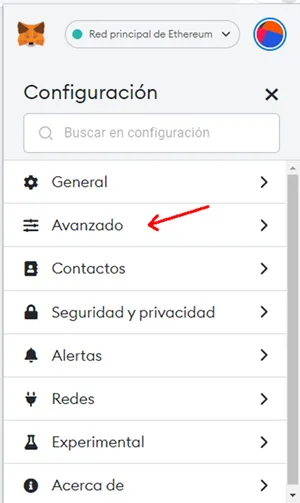
1. When opening Metamask in the browser, press the colorful icon at the top right (1) and then the “Settings” menu option at the bottom (2). It will then display the following:
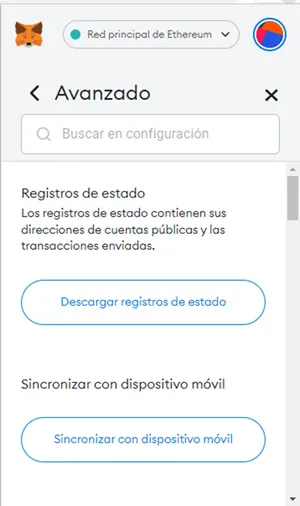
2. Select the “Advanced” option then the following screen will be displayed:
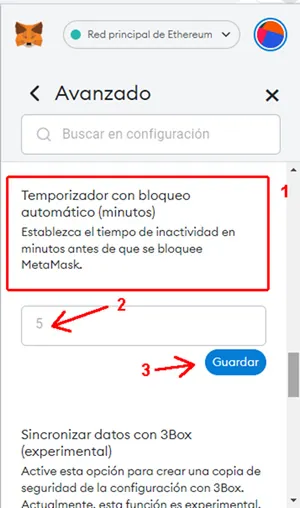
3. Scroll down until you find the following option:
4. Go to “Auto-block timer (minutes) Set the idle time in minutes before MetaMask crashes” (1) then enter the number of minutes that have to pass for Metamask to block automatically without restarting the system. equipment and/or the browser (2) . Finally we press “Save” (3) . By default this option suggests 5 minutes, but perhaps so that it is not too annoying when we operate with the purchase of NFTs, it is convenient to enter 10 or 15 minutes, or leave it as it is since by default Metamask does not block except by closing the browser or restarting the computer.
NFT Trends